11 Easy Steps to Edit Drawings in Photoshop to Stand Out in Social Media
You notice how some photos stand out more than others online and you want to learn how to do the same. Creating a great drawing is difficult enough, but making sure you have a great photo of it can be just as stressful.Fear not—here is a quick guide on how to edit drawings in Photoshop that I should’ve made forever ago!I’m going to keep it as simple as possible for you.Let’s do this.
If you want to learn my drawing process read this.
If you want to learn how to do time-lapse videos of your drawings read this.
Capturing the Shot
Starting off, once you’ve finished your drawing it’s important to get the best photo possible. You can study how other artists set up their compositions but I keep it pretty simple by sometimes adding the tool I used to:
- show the scale of size.
- avoid the “What pen is that?” question.
For real though, if you want to know what pencils, pens, paper, etc. that I use check out my resources page.
I use an iPhone 6+ for all my shots (no fancy DSLR camera needed…..phew). However, lighting is crucial. I try to use natural light pouring through my windows (an overcast day is the best causing less harsh shadows). I find shooting by a window between 12–5pm works best for me.Tip: A trick my buddy Colin Tierney (creator of Crayligraphy) taught me was to take any white sheet of paper and angle it at 45° opposing the light source to evenly reflect light back onto your artwork.Note: Getting creative with your shots is cool, but don’t get cute. I don’t recommend putting things in the photo that are completely irrelevant to what tools you’ve used or unrelated to the overall context (old coins, matches, cactus, rustic keys, etc.). Do what you please, but I'm definitely not a fan.
Working Your Magic in Photoshop
1. Open Photoshop (click the little Blue PS app icon….obviously)2. File > Open (cmmd+O / control+O) or drag your photo onto the Photoshop icon 3. Immediately we will save your file with a Save As action by going File > Save As (cmmd+shift+S / control+shift+S)
- continually save throughout by hitting (cmmd+S / control+S)
4. Duplicate your image layer by selecting and dragging onto the paper icon at the bottom of the layer panel
- additional ways to duplicate: (cmmd+J) or right click layer and select duplicate layer
- we always work non-destructively so we can always revert back to original
 5. Add level adjustment layer
- left side shadows (bring in a smidgen to the right)
- middle is midtones (usually bump to the right a bit)
- right side highlights (bring in a smidgen to the left)
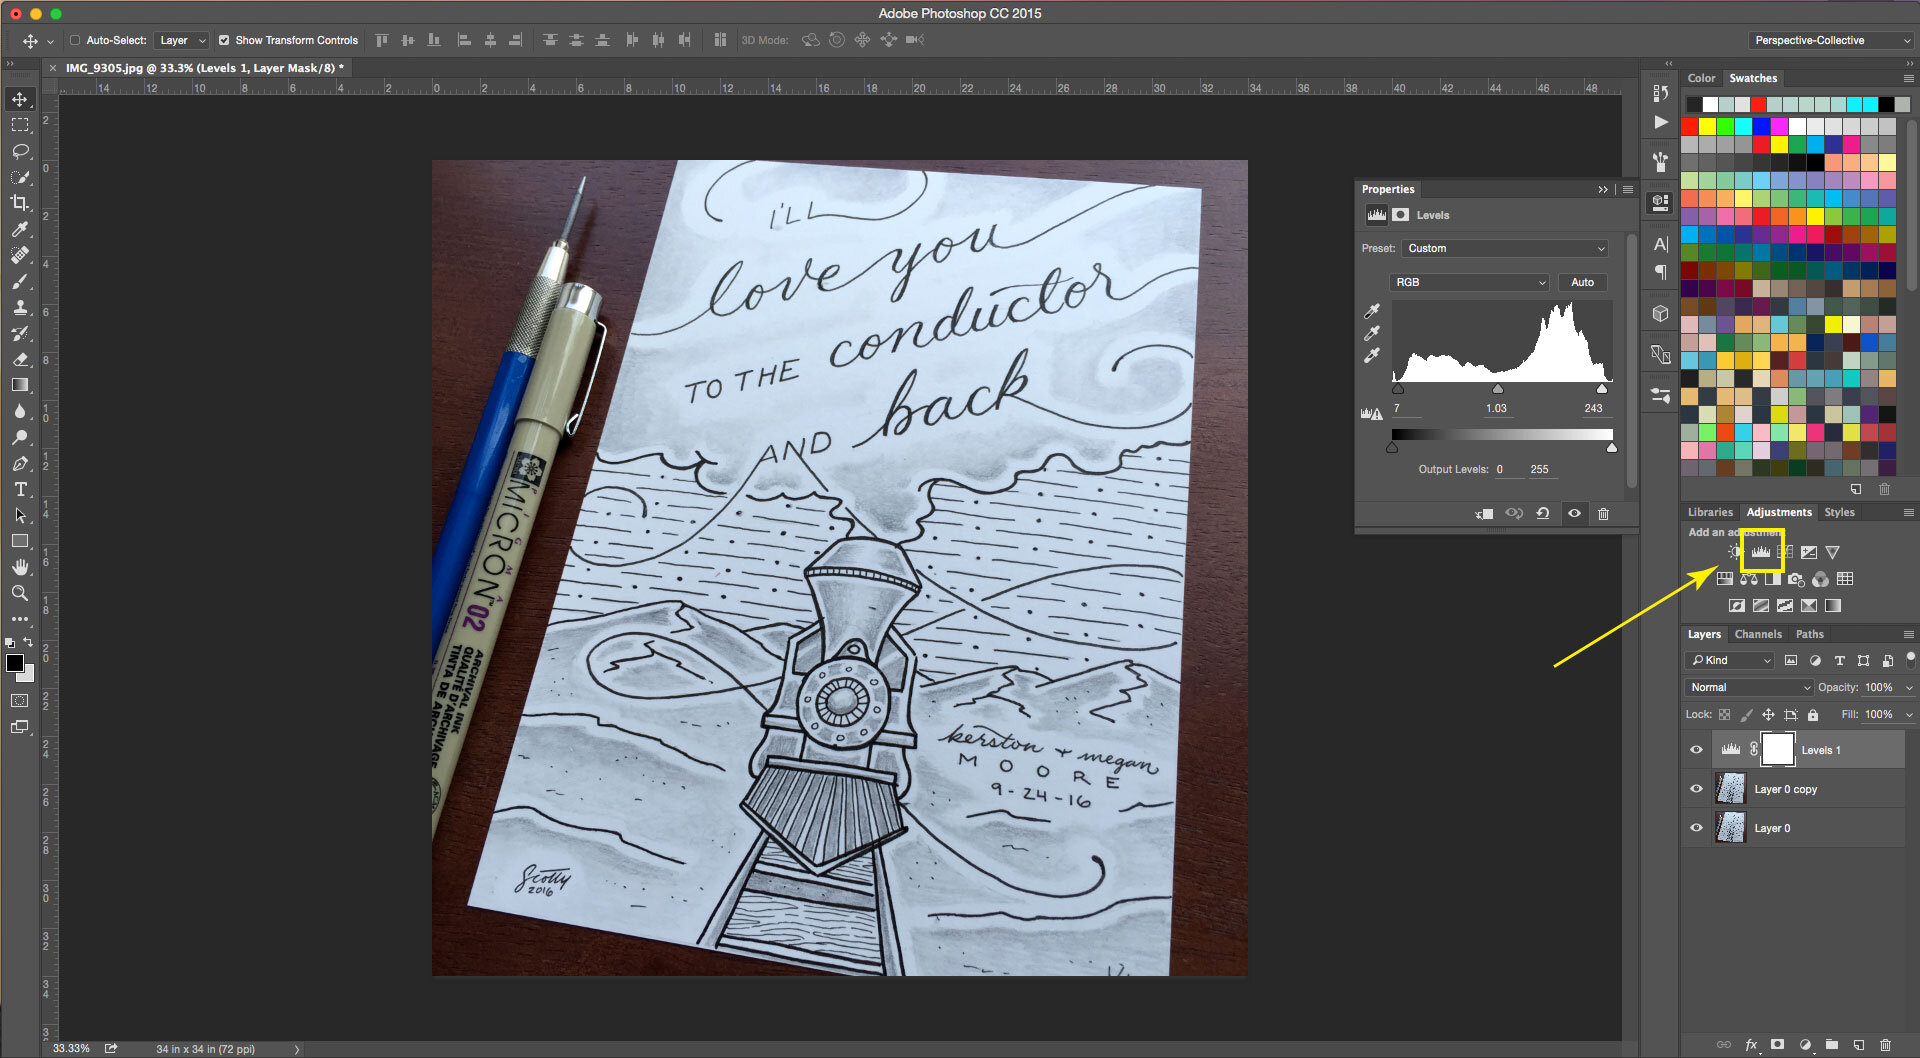 Note: If you don’t have the best lighting, you may have to bring your highlights in more to brighten things up6. Add Brightness/Contrast layer
- up the light for a brighter image. works great for just ink on white paper
- up the contrast. works great for just ink on white paper
Note: If you use graphite in your drawings, both of these settings along with the highlights in your levels will reduce the appearance / depth of your graphite 7. Use the Vibrance setting to richen up the colors in your photos (optional)
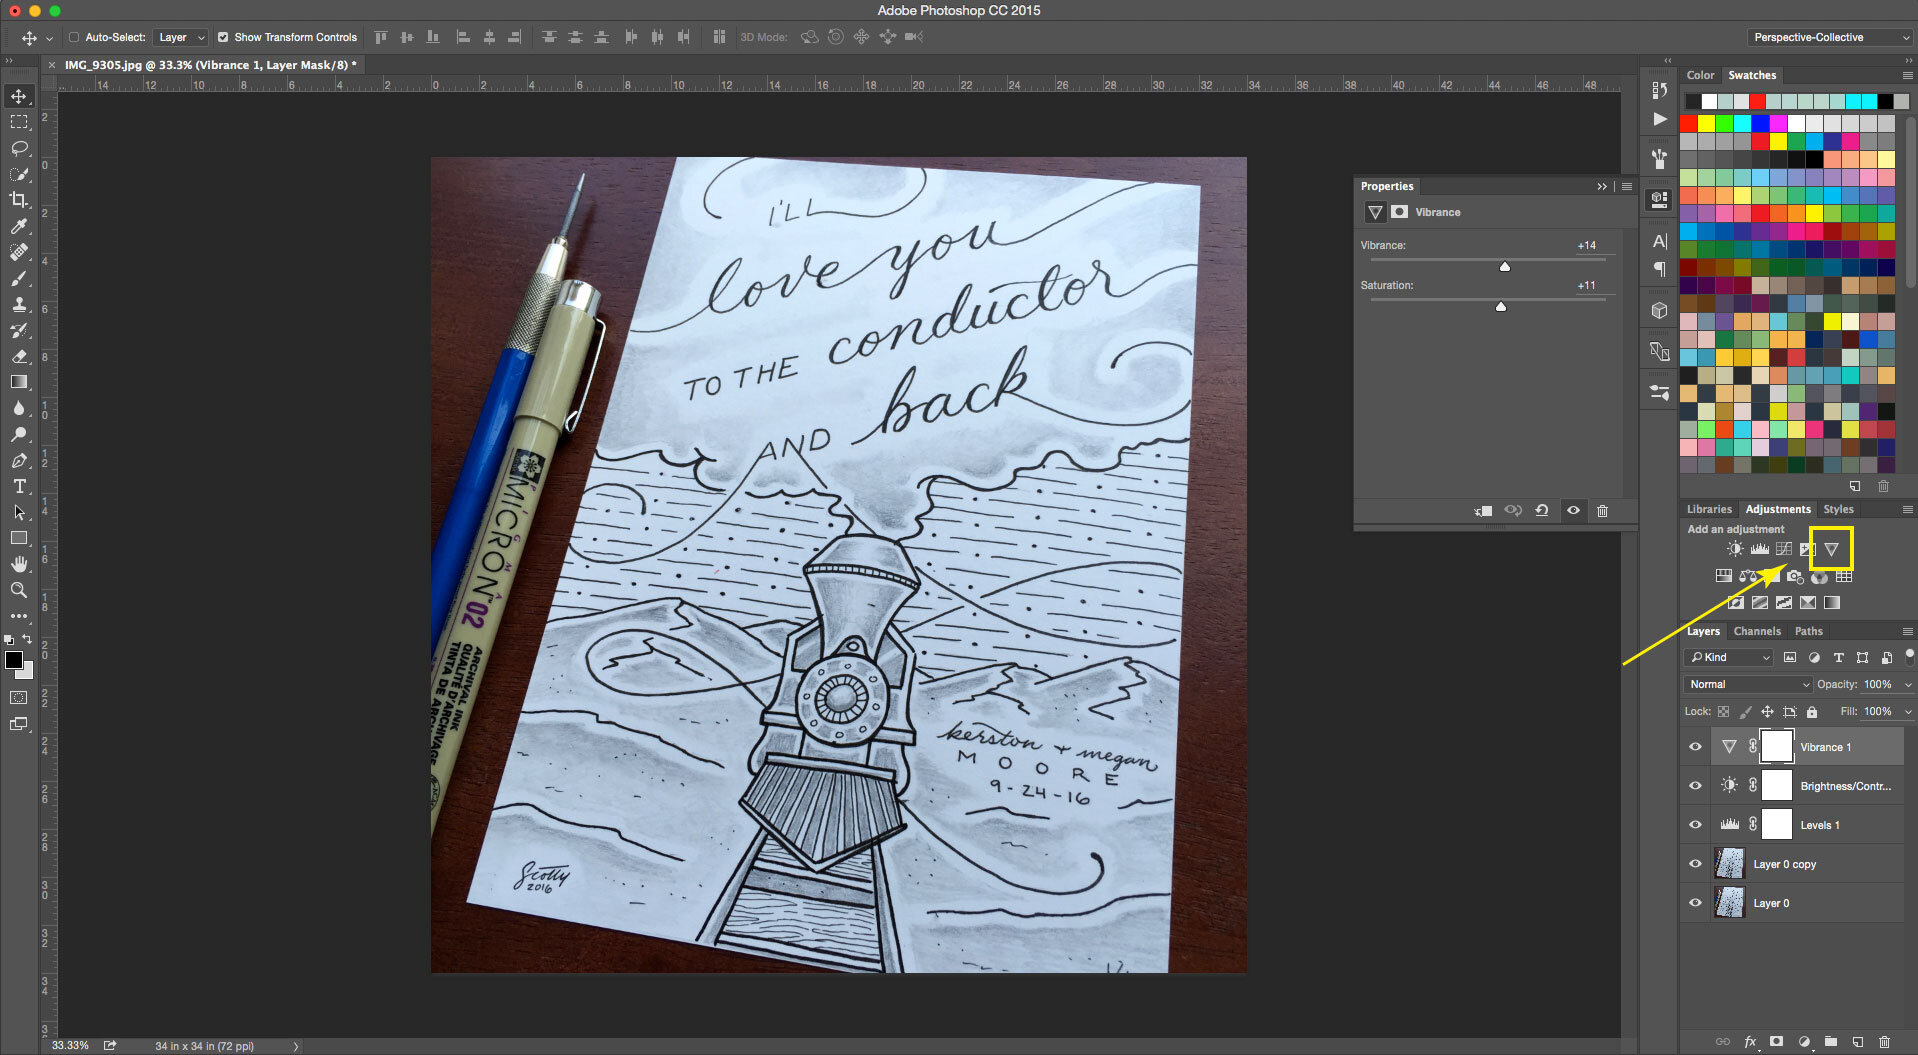
- not necessary in B&W images only
- only available in RGB
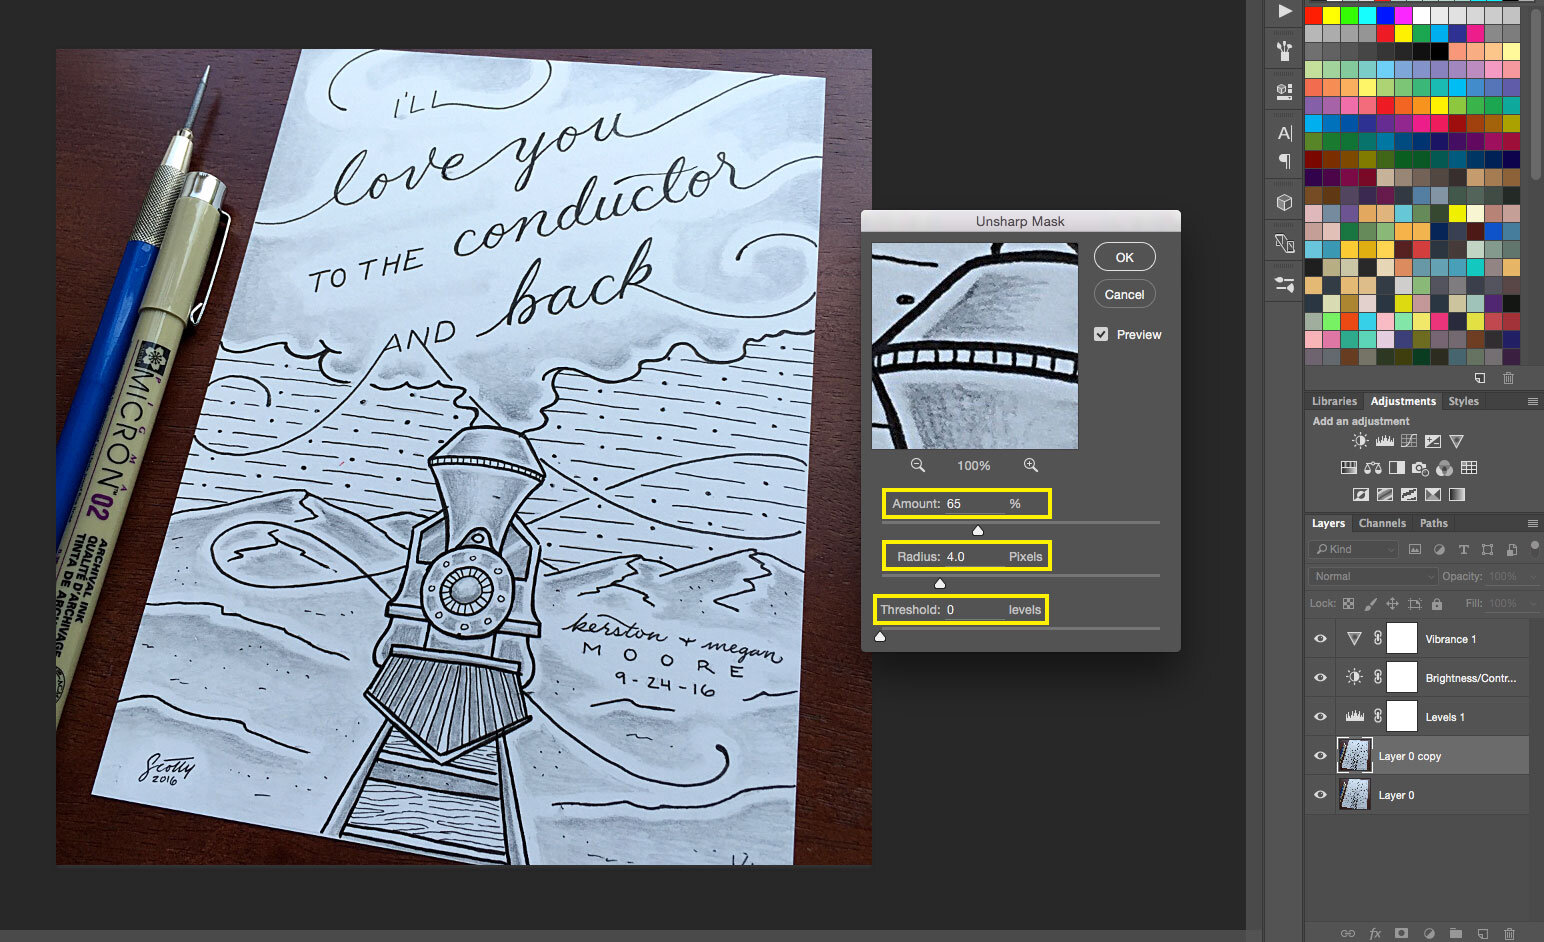
 8. Sharpen the detail in your image with Unsharp mask: with duplicate image layer selected go to the control panel and select Filter > Sharpen > Unsharp Mask
- I keep the amount between 30–80 max
- Never go about 4 for your radius
- Keep threshold at 0
Note: This is a great trick if your image is a little blurry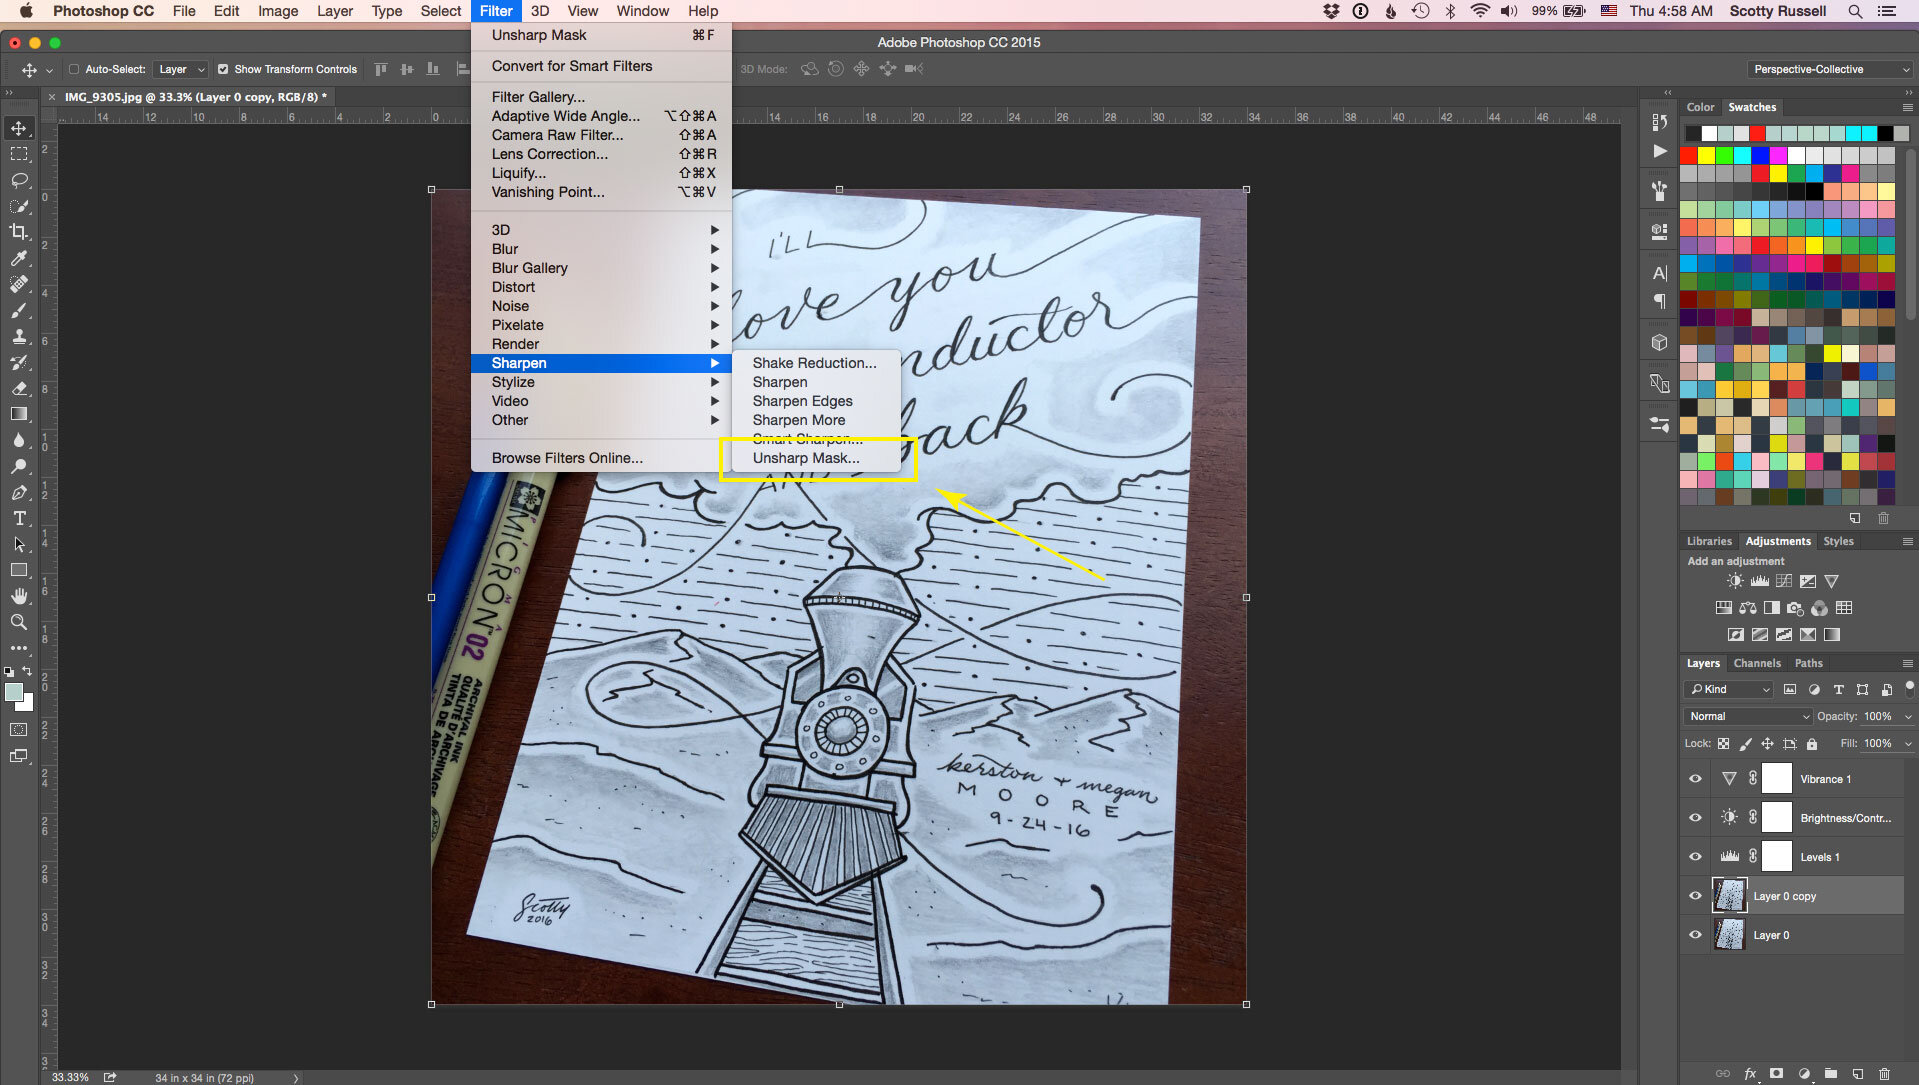
 9. If you have blemishes to remove on your drawings such as smears, ink spots, dust particles, etc., use the Spot Healing Tool or Clone Stamp
- I highly recommend watching Youtube videos of these
- If you do need to clean up your image I advise shutting off your adjustment layers first by clicking the eye ball on each layer.
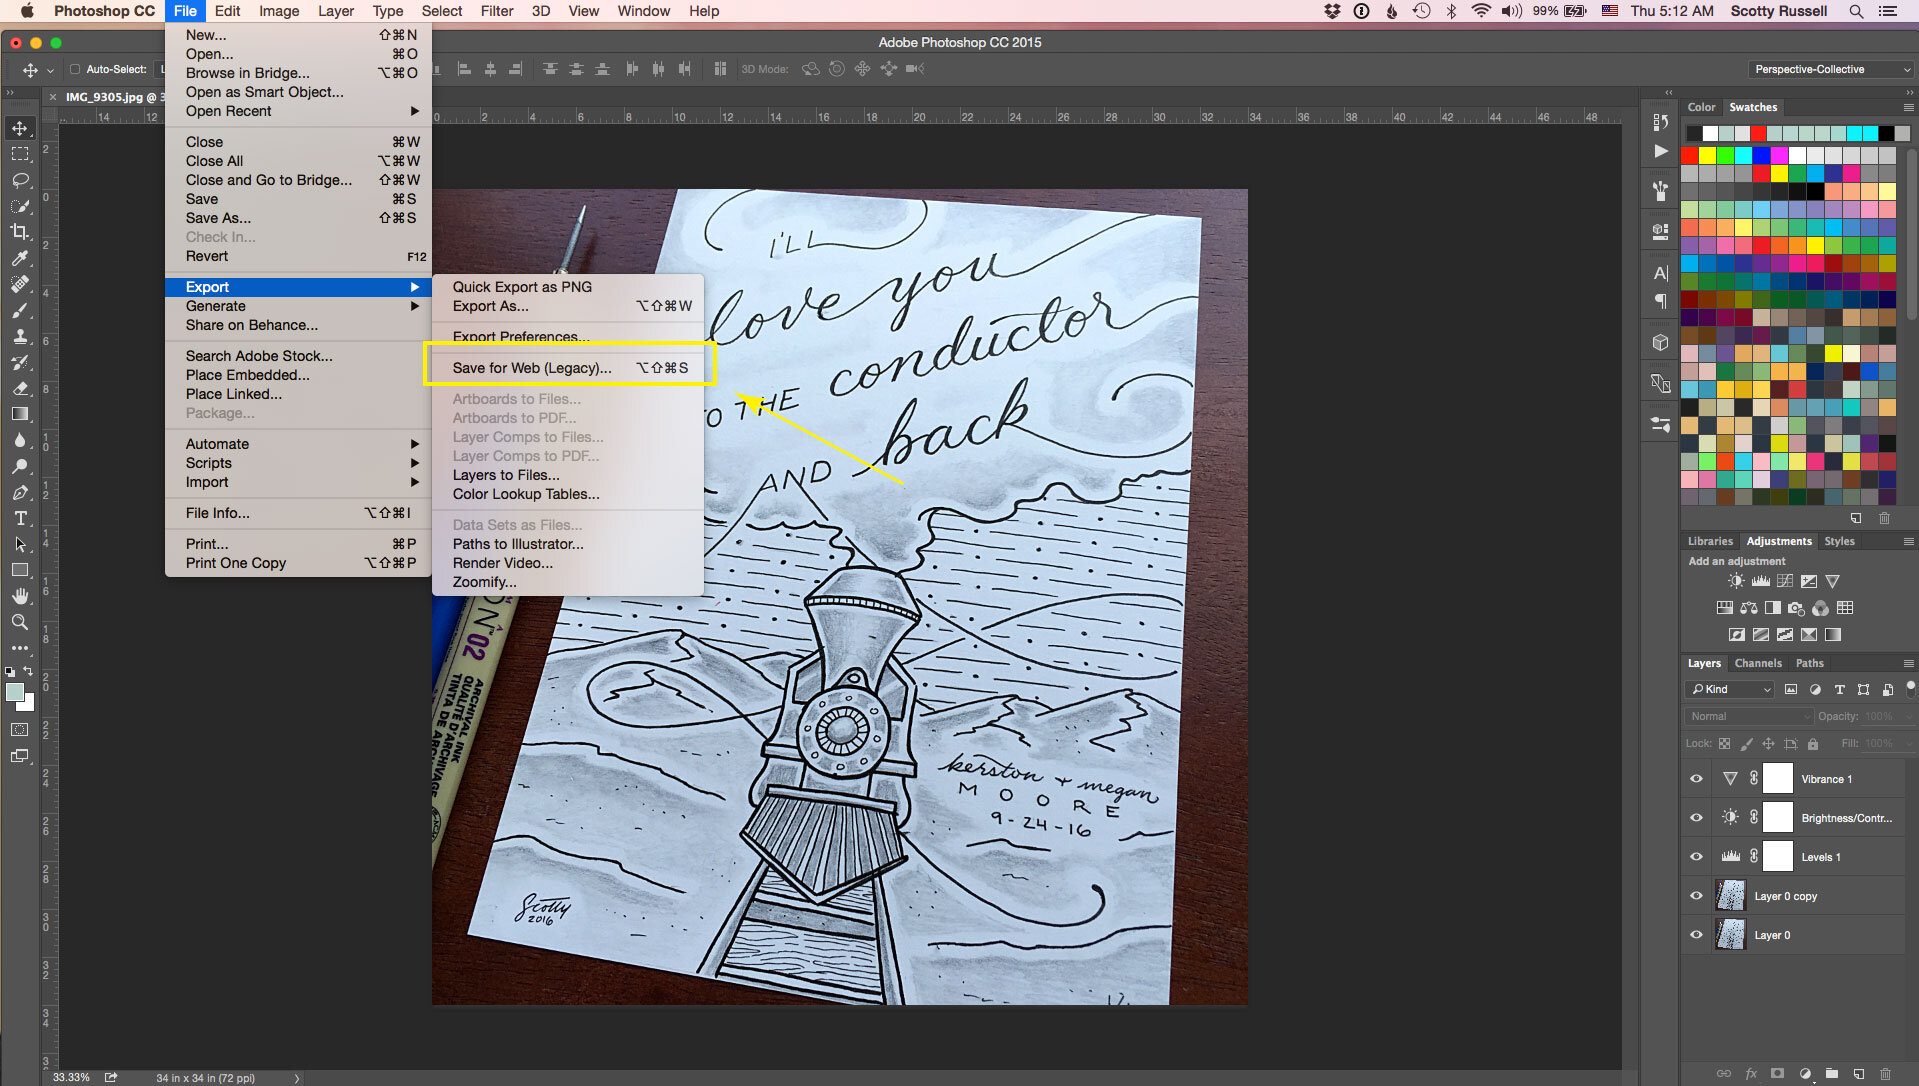
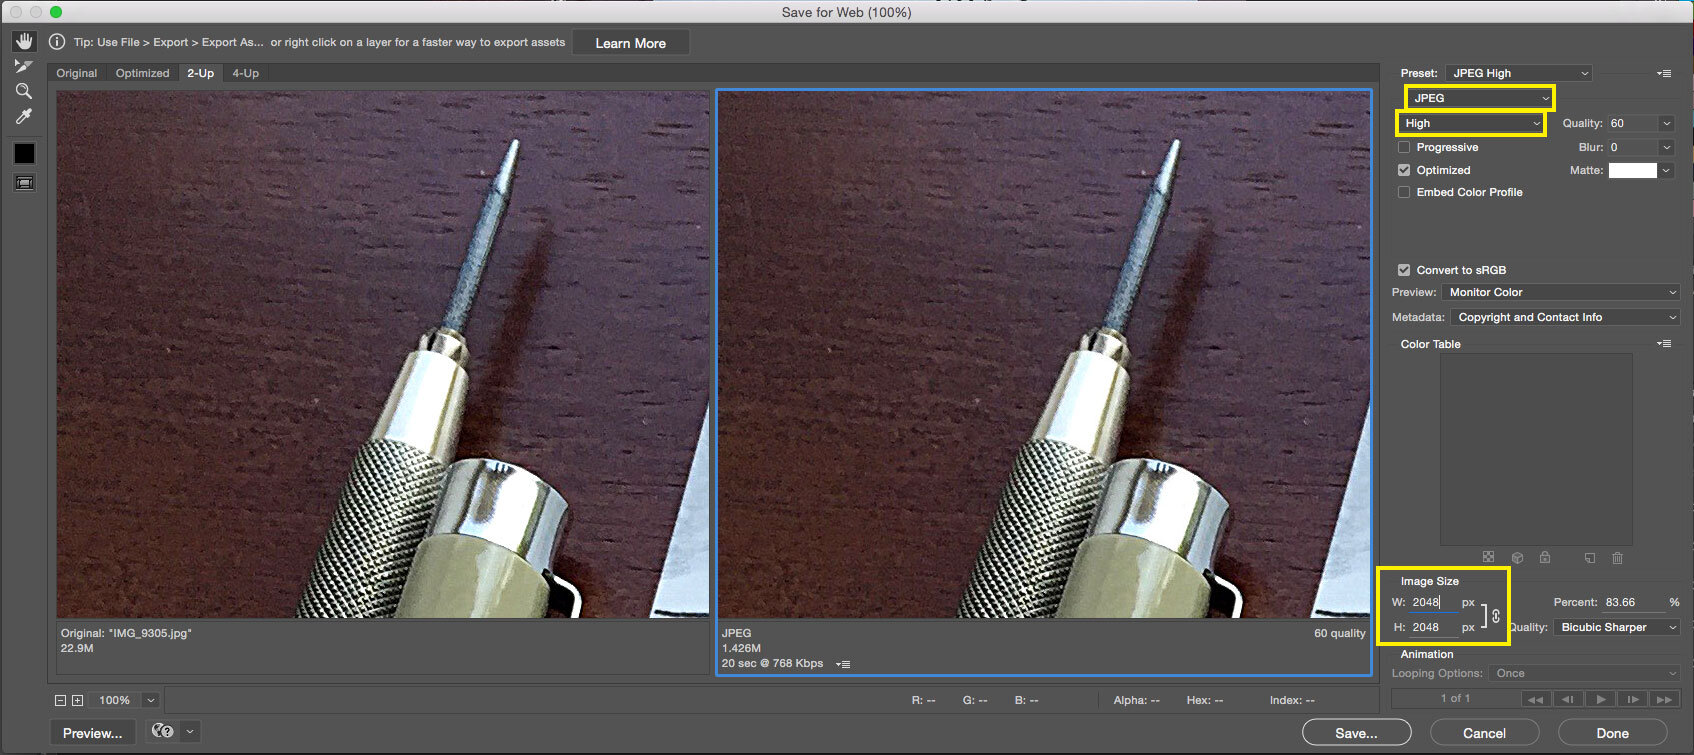
10. Now we need to Save for Web by going to File > Export > Save for Web (Legacy) or (cmmd+shift+alt+S / control+shift+alt+S)
- Select JPEG, quality of High and 60
- My largest width I roll with is 2048px for Wordpress web retina displays
- If you’re just using on social media I stick to 1200px width
 11. Upload your image to your site or copy it to either Dropbox, Google Drive or Airdrop it to yourself to get it on your phone to post.
Additional Notes / Tips:
- 1:1 ratio is a square cropped image so this example would be 2048 x 2048px or 1200 x 1200px
- 4:3 ratio is your typical horizontal or vertical layout which for web would be 2048 x 1536px or 1536 x 2048px
- Dribbble would utilize a 4:3 ratio at 800 x 600px
- Organize your files by keeping similar file names and keep in designated folders for quick search reference (i.e; filename_web or filename_social)
- If your lighting is poor, change your image to grayscale to give yourself some flexibility with your levels and contrast adjustments